"SWEET ON YOU"

One woman's insight into her daily life and some 'adventures'.............cooking, collecting, travels etc. With a lil' bit of this and that...........

Saturday, December 25, 2010

MERRY CHRISTMAS

Wishing everyone a very
"Merry Christmas".

Friday, December 17, 2010

Mexican Wedding Cookies


These cookies I think that everyone bakes for Christmas one time or another. They
also masquerade under several names like Russian Tea Cakes, Swedish Tea Cakes, Moldy Mice, Snowballs, Butterballs, Pecan Sandies, Pecan Snowballs etc........
They are a melt-in-your-mouth buttery cookie, they became popular in the 1950's......and 1960's. This is a recipe that my Mom and Aunt have been using for years and this was the first cookie that I made by myself if memory serves me right when I was in high school.
Then when I go married this turned out to be my husband's fave cookie, so when I make them for the Holidays I usually triple the recipe. One for him and the rest for gifts to package up.
Mexican Wedding Cookies
(Source; Family)
1 cup (2 sticks) butter, room temperature
1/2 up confectioner's sugar
1 tsp. vanilla
2 cups flour
1/4 tsp. cinnamon (optional)
1/4 tsp. salt
1 cup pecans OR walnuts, finely chopped
*Extra Confectioner's sugar for dusting cookies


DIRECTIONS:
Preheat oven to 350 deg. F.
Cream butter and sugar till smooth...........add vanilla and beat till fluffy.
Sift flour, cinnamon (if using) and salt and mix into butter mixture till well combined.
Add the chopped nuts and mix well.
Chill for 20 minutes til a bit firm.
Form dough into walnut size balls and place on parchment lined baking sheet 1 inch apart.
Bake for about 15 to 18 minutes til golden brown (I just keep checking).
While still warm roll the cookies in some confectioner's sugar and put on cookie racks to cool. When cool sift some more confectioner's sugar over cookies.


I give myself a treat and am waiting for a cup of tea to brew.


Thanks for stopping by...........I appreciate you taking the time. I am linked to;

Tuesday, December 14, 2010

Antipasto Squares

"ANTIPASTO SQUARES"
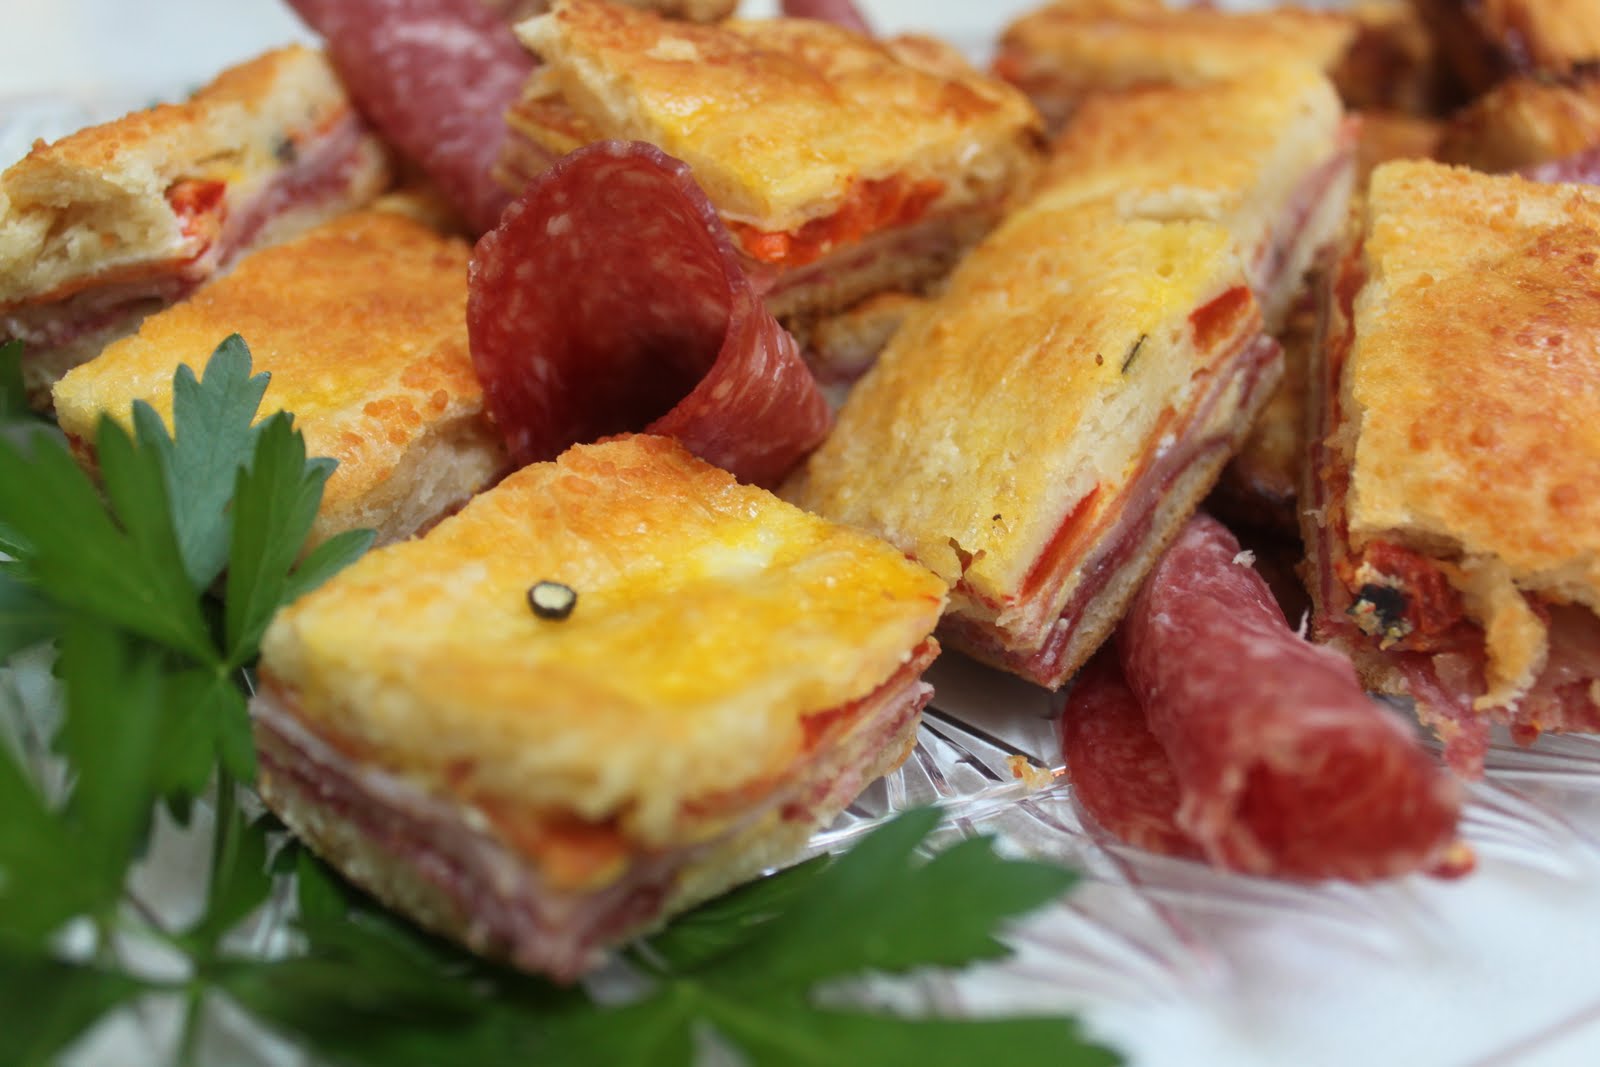
One of the biggest hits of the party are these Antipasto squares.........they are always first to go. Usually I make double because the first platter will disappear very fast. I know they are not so healthy or are good for the waist........but hey a lil' won't hurt. Plus I don't make them all so often. Here you can see I had some leftover Salami so instead of me nibbling away I just added it to my platter.
I use to make them more often but then they got pushed back in my recipe files till my Foodie friend Lizzie who has this great Blog at
The Skinny Chick Can Bake made them and so I digged deep and put the recipe back into my files.


INGREDIENTS:

2 (10 oz.) cans refrigerated crescent rolls
1/4 lb. thinly sliced ham
1/4 lb. thinly sliced provolone cheese
1/4 lb. thinly sliced Swiss cheese
1/4 lb. thinly sliced Genoa salami
1/4 lb. lb. thinly sliced pepperoni sausage

1 (12oz.) jar roasted red peppers, drained, cut into thin strips
3 eggs
3 Tbsp. grated Parmesan cheese


DIRECTIONS:
1. Preheat oven to 350 degrees F.
2. Unroll one package of crescent roll dough, and cover the bottom of a 9 x 13 inch pan. Layer the ham, provolone cheese,salami, Swiss cheese, pepperoni, and red peppers on topof the dough.
3. In a bowl, beat eggs lightly, and stir in the parmesan cheese. Pour 3/4 of this mixture over the peppers. Unroll the 2nd package and place over the top of the peppers. Brush with the remaining egg mixture..........cover with foil.
4. Bake for 25 minutes..........remove foil and bake another 15 minutes or till the top is fluffy and a nice golden brown.
5. Cut into squares..........this can be served warm or room temperature.
****Sometimes I add chopped stuffed olives on top of the red peppers.
These are great if asked to bring an appy to a party, very easy to transport and won't make a mess.


Thank you for stopping by, really appreciate it you taking time.
Have a great day!!!!

I'm linking to

"Foodie Fridays"

"Katies Cucina"


Sunday, December 12, 2010

Candy Cane Reindeer

"CANDY CANE REINDEER"

These Candy Cane Reindeer were made for my daughter's Christmas cards that she handed out to individuals with intellectual disabitlites that she is President of in her University.

Okay which one of you is "Rudolph" the Red Nose Reindeer?????


Here is Rudolph.........


Taped these to some Christmas cards.
Here's a link on how to make these Candy Cane Reindeer.
Thanks for stopping by and I appreciate any comments.

Friday, December 10, 2010

Christmas Tree

Today I'm on romantichome.blogspot.com
Be sure and visit the other participants for some interesting and inspiring posts.


This is one of my Christmas trees. It has all the ornaments that I have collected since childhood throughout the years.


Here's Santa.......writing away. I guess all the places he has to visit Chritmas Eve.
Thanks for stopping by my Blog. I appreciate any comments.

Tuesday, December 7, 2010

Kataifi Squares

Christmas is around the corner............
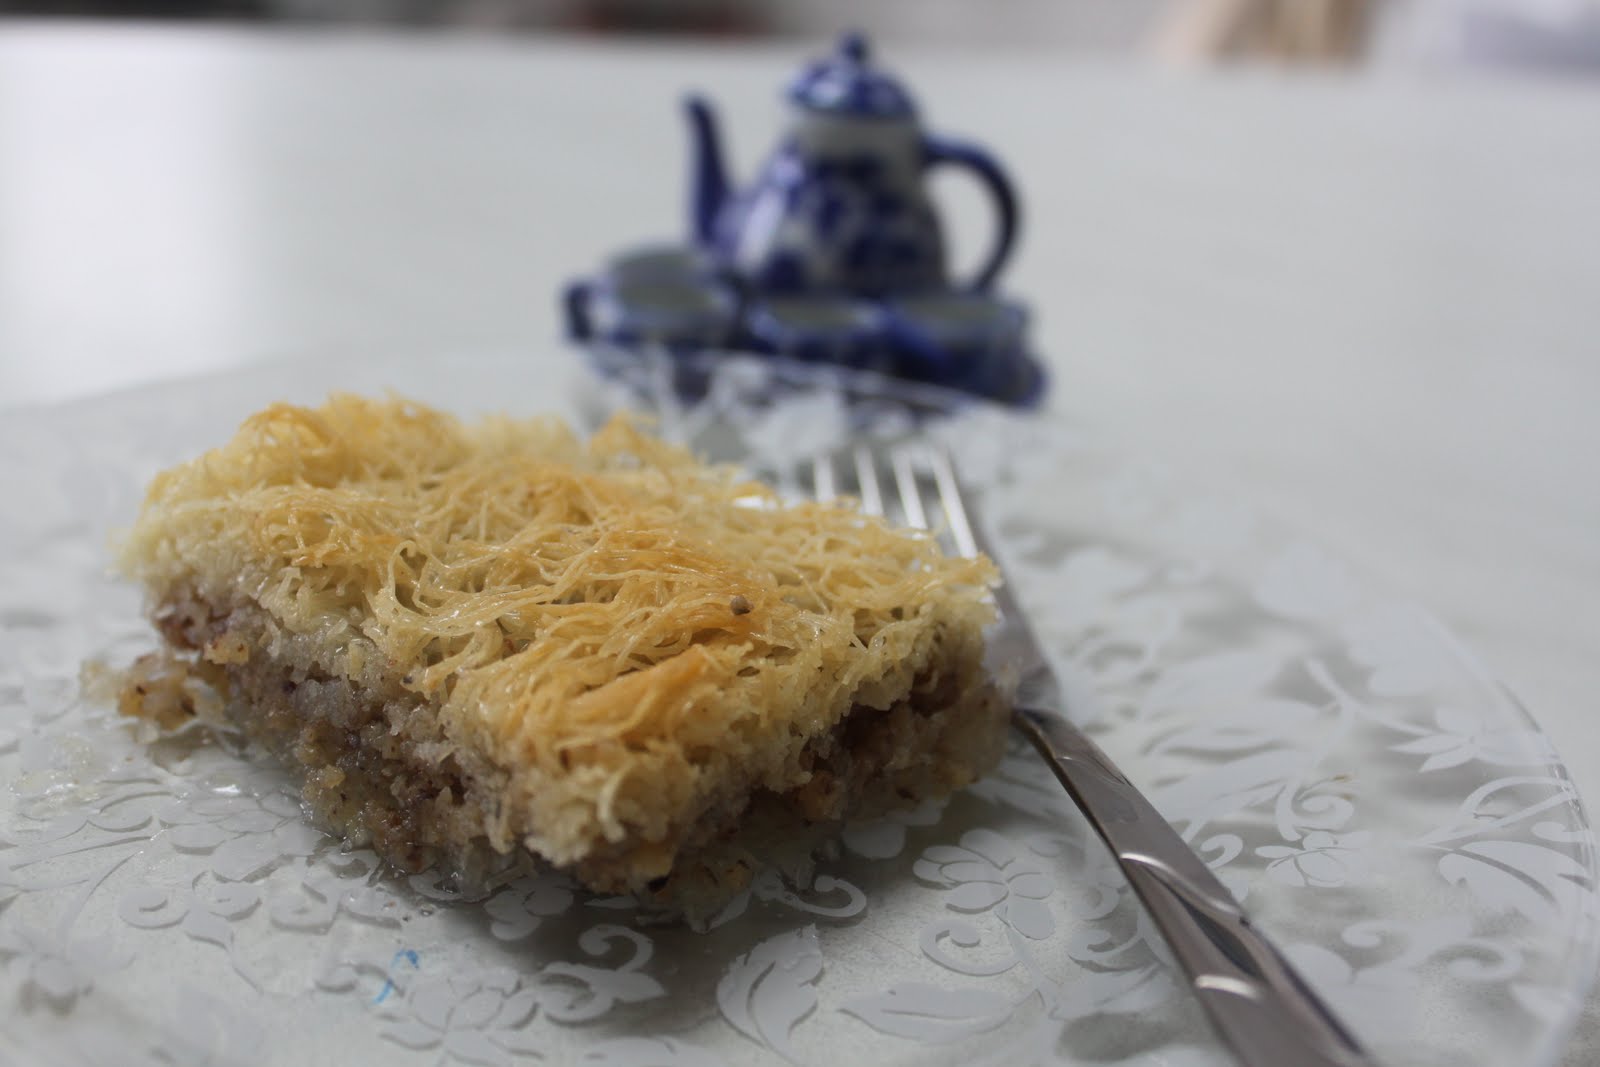
KATAIFI
Kataifi is a very fine vermicelli-like pastry. Sometimes known a "shredded phyllo". Basically it's like a cousin to the Baklava. You can find it in any Middle Eastern store but sometimes I can find it in my local supermarket. You have to work very fast with it so it doesn't dry up and keep it moist. You can do various fillings but this is my husband's favourite. He grew up with this as he originally is from Turkey.
Most Turkish women I find there don't make it at home themselves because all over the cities they have these cute lil' Pastry shops filled with any kind of "phyllo" pastry thing you can imagine. So why bother with some of this labour intense baking.
But I find living in Toronto not too many Turkish pastry shops unless I go to a Greek pastry shop I will find some kind of homemade tasting 'phyllo' dessert......... but me being a good wife learned to whip these desserts for myself.
This dessert has an alarming and heart attack amount of butter and sugar but hey a lil' piece goes a long way.
Kataifi Squares
Source; On the back of frozen Cedar Kataifi box.
16 oz. [1lb.] Kataifi, defrosted
1 lb. walnuts, finely chopped
1 lb. [2 cups] butter, melted
Preheat oven to 375 deg . F.
Tear 1/2 of Kataifi into small shreds. Spread evenly over bottom of ungreased 15" x 10" baking pan.
In medium bowl, combine walnuts.
Spread evenly over the Kataifi in pan.
Tear remaining Kataifi into small shreds. Place evenly over mixture pressing lightly................
Spoon butter evenly over the entire surface of Kataifi.
Bake for 30 to 40minutes until golden brown.
Spoon syrup over Kataifi immediatley after removing from oven.
Let stand covered at least 30 minutes before serving warm.
Syrup
3 cups water
2 cups sugar
2 tsp. lemon juice, fresh
Combine all ingredients in a saucepan.......bring to a boil and allow to simmer for 10 minutes. Cool and then pour over hot baked Kataifi.
Makes 36 servings.

Shredded Kaifi dough in pan.

Chopped walnuts on top of Kataifi shredded dough. Sometimes I like to add in chopped piatschio's, but that day didn't have any on hand. It gives it a lil' green colour.

Already baked and as you can see my husband couldn't wait to eat some.

Syrup oozing out.....


Thanks for stopping by.........and visiting my Blog.
I really appreciate any comments. Have a great day!!!!!